First of all, we are really happy to see that you choose BitNinja to protect your server. The installation process usually takes around 4-5 minutes.
Linode
You can deploy a Linode VPS with BitNinja installed from the Linode Marketplace based on our documentation. Or install BitNinja on the existing Linode VPS as shown below.
You can deploy a Linode VPS with BitNinja installed from the Linode Marketplace based on our documentation. Or install BitNinja on the existing Linode VPS as shown below.
Instructions
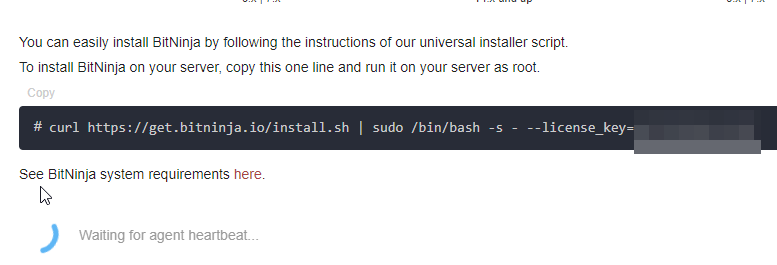
You can install the BitNinja agent on your Linux server with the one-line installation command.
- Open the Dashboard
- Copy the installation command from the Dashboard
- You can see the installation code on the start page if you have no servers added yet to the account.
- If you already have servers added to the account, you need to click on the + Add new server button next to the server’s box
- Paste it into your server’s terminal and hit enter
- then press Y when you are prompted to confirm the installation
- After the compatibility check make sure to read the output. You will be prompted to confirm the installatation if there is some sort of incompatibility detected.
Installation failed
If the installation failed for some reason please check out this Knowledgebase article. Or contact our support ninjas via chat or leave a ticket.
If the installation failed for some reason please check out this Knowledgebase article. Or contact our support ninjas via chat or leave a ticket.