By default, the debug mode is disabled in BitNinja. If you wish to enable it you might need to make some modifications in /opt/bitninja/etc/config.php . However, this is a temporary solution as this will be overwritten with every update.
The Debug Mode has 3 types of output : Console, API, File. We recommend to use the File output as it is the most readable and you can save it for later if needed.
If you wish to set up the debug mode in BitNinja:
- Establish SSH connection to your server with a root permission
- Open the
/opt/bitninja/etc/config.phpwith your preferred text editor
e.g.:nano /opt/bitninja/etc/config.php - Find the name of the module int he text
- in nano you can use
Ctrl+wand then enter the corresponding logfile’s name usually they start with “mod. ” e.g.: mod.malware_detection.log
- in nano you can use
- Modify the
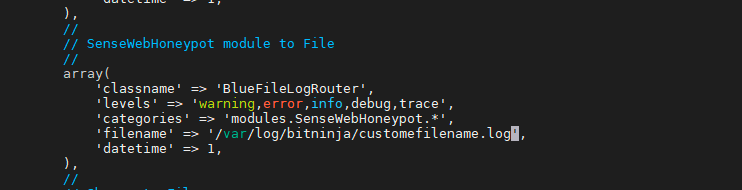
‘levels' => 'warning,error,info’, line to'levels' => 'warning,error,info,debug,trace ' - Also, modify the
'filename' => line to 'filename' => '/var/log/bitninja/customfilename.log',
- Save the changes and exit the text editor
in nano pressctrl+xthen pressythen enter
Then you will have a log file with all the output of the module you wish to use in debug mode.
- Restart BitNinja with service
bitninja restart command
You can copy and paste the commands from the below video.
If you used
You can use
'filename' => '/var/log/bitninja/customfilename.log' in the log then you can find the output of the module at /var/log/bitninja/customfilename.logYou can use
tail -f /var/log/bitninja/customfilename.log to see the output of the module continuously.