In Plesk, the X-Forwarded-For header is already included with all IP addresses of the server in the configuration files of all web server applications. If remoteip is not enabled yet, you need to enable remoteip. from Plesk.
- Go to Tools and settings
- Apache Web Server
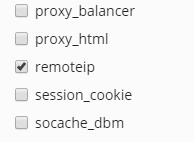
- Tick in remoteip’s checkbox under Apache modules
Please also check the logformat in the file if it looks like this:
"%a %l %u %t \"%r\" %>s %b \"%{Referer}i\" \"%{User-Agent}i\"" combined
After that is done please restart the web server
In some cases, the module might be not visible in which case you can check if the module is enabled with one of these commands depending on the operating system running on the server: apache2ctl -M |grep remote
httpd -M |grep remote
Enable the WAF module
Now we can enable the WAF module if it was not enabled yet. You can enable the module from the Dashboard/Servers page by clicking on the cogwheel icon next to the server’s name and then clicking on the Switch button next to the WAF 2.0 module.

You can test if the WAF module is working if you add
/?test=/etc/passwd after one of the domains hosted on the server. e.g.: www.example.com/?test=/etc/passwd It will trigger the WAF module.You can also test the module by following this GUIDE