Our Defense Robot module is proactively looking for backdoors and malware on the server.
However, the file signatures generated by the Defense Robot are in a validating state by default. This means that the files matching these signatures are only logged but not quarantined to avoid false positive catches.
All files matching the published signatures will be quarantined on all of your servers under your account.
How to validate file signatures?
- You can reach the signature validating feature from the Dashboard under the Anti-Malware menu in the Overview section.
- Click on the “VALIDATE MALWARES” button on the dashboard or click here.
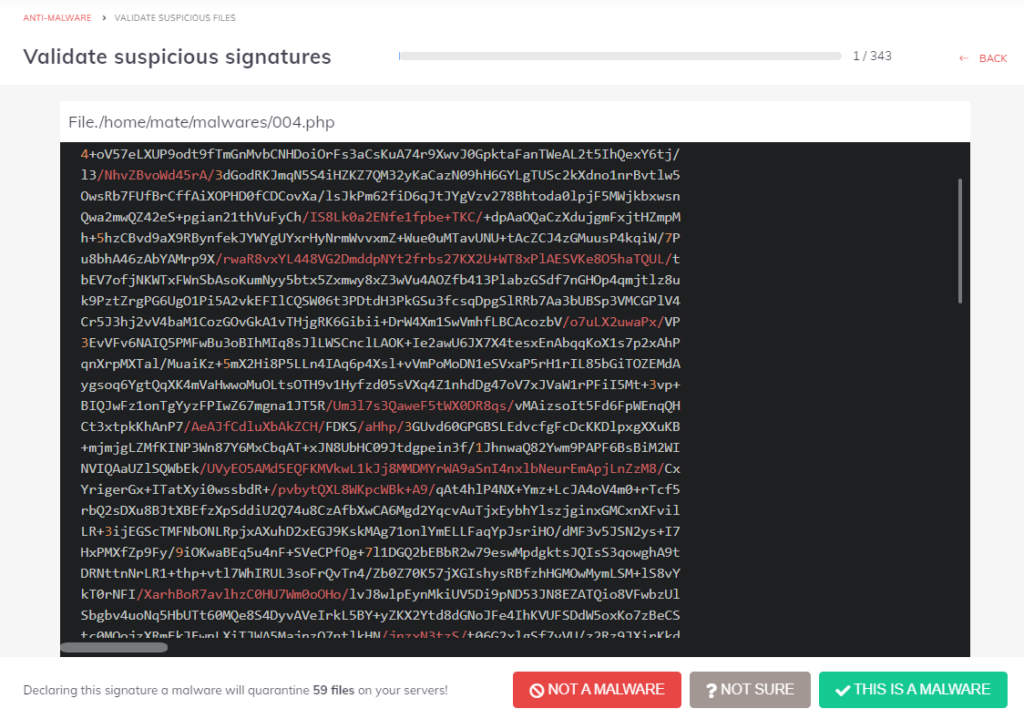
- Decide if the file is malware based on its content.
- With the buttons under the view panel, you can
- Publish the signature with the “This is a Malware” button
- Skip the file with the “Not sure” button
- Allow list the file with the “Not a malware” button
The name of the signature is visible above the file’s source code:
- File./home/domain/malware.php: Manually generated signature
- DefenseRobot./home/domain/malware.php: The Malware signature was created by the Defense Robot module.
- CaptchaHttp./home/domain/malware.php: The file was uploaded to our captcha page by some bot.

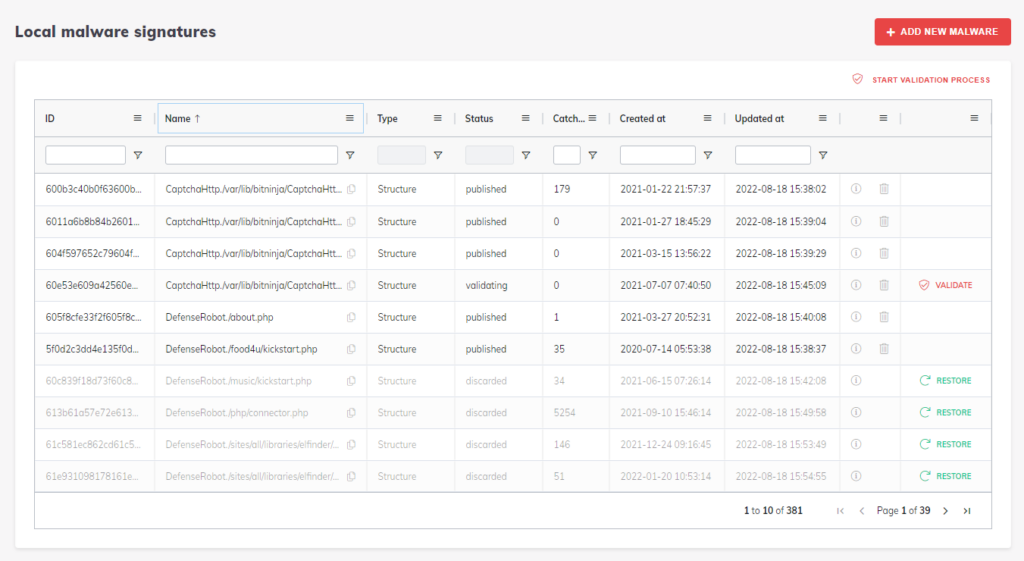
You can also access this feature from the Anti-malware/Local malware signatures menu by clicking the “Start validation process” button.

Upload malware
You can also upload files from the Dashboard to generate a malware signature. To do so, click on the + Add new Malware button at the top right of the Local malware signatures menu. The signature will be in a validating state, and the signature ID and the number of matching files on your servers will be displayed within 5 minutes in the Table of malware signatures.
You can also discard the accidentally validated signatures from the Local malware signatures menu point by clicking on the trash bin icon on the left after finding the signature. To find the signature you can filter by status for “published”.
If you accidentally clicked on the “Not a malware” button, you can recycle the signature so it can be validated afterward. Just filter by status for “discarded”.
In case of accidental validation or discarding (CLI)
If you have mistakenly clicked on the “This is a malware” button, you can restore and Allow list the files matching the signature from the BitNinja CLI with the following command:
bitninjacli --restore=/path/to/file
If you don’t know the original location of the filet, you can list all published signatures with this command, including their original location:
bitninjacli --module=MalwareDetection --list-signatures --state=published
You can also use the file’s signature to discard the published signature:bitninjacli --module=MalwareDetection --discard-signature --id=
If you accidentally clicked the “Not a malware” button, you must find the file’s signature ID from the BitNinja CLI and change the signature’s status.
bitninjacli --module=MalwareDetection --list-signatures --list=white
From here, you will need the malware signature ID.
Then issue this command with the signature ID included.
bitninjacli --module=MalwareDetection --publish-signature --id=
